Saturday, 31 August 2013

God Bless Betsy Blossom

Thought I would take the opportunity to share with you a card I made recently for my beautiful great-niece Betsy Blossom for her christening.  

It was a 8x8 card covered in pearlescent cream and turquoise card.  I used the spellbinders dies to cut the corners, the church window and a cuttlebug embossing folder to create the stained glass effect.  The butterflies were peel offs on cream card (one of those things that I had forgotten I had and found them whilst looking for a little peel off cross!)

We had a lovely day, although poor Betsy wasn't feeling very well and didn't appreciate having her hair washed in the font lol!  

Please leave a comment, even if you just popped in to have a peep, all visitors and their comments are always welcome.  


35 years!

Thought it was time to update my blog and share with you a card I was asked to make for a friend for his wife on their anniversary.  They have been married 35 years and are still madly deeply in love.  I admire anyone who can be after all that time (sorry don't mean to sound cynical! but I could only manage 10 years of marriage, well I could have managed more if my husband hadn't decided the grass was greener on the other side!!!). Anyway, that's all in the past and now I have a partner of 18 years (that's the time we've known each other not his age!!!! I should be so lucky....). We've lived together twelve and it works very well - he has his hobbies and I have mine and as long as we meet in the middle sometimes (ooh misses!) we're quite happy.

Anyway, enough waffling, for all you card makers out there lets get back to the card.

Once again I've used an 8x8 card, covered in rose pink and white pearlescent card.  I used the grand square nesties and the spellbinders border and edgeabilites dies.  I used the Inkylicious 'delicate vines' stamp which is great for backgrounds, very versatile, whatever the occasion and embossed it in Wow embossing powder.  The rest is self explanatory really.  If you have any questions please do not hesitate to ask, but please leave a comment so that I know you've popped by.  Thanks.  Off to make the box to put it in now - that should be fun.......


Wednesday, 17 July 2013

Purple & Turquoise Art Deco

Here's the other card I was asked to make for the weekend.  I had previously made the same card in black and red for a 21st birthday.  That was no problem, but this time the customer (or my friend Kerri) requested a lady in purple!  The only problem I had was that the image was on a CD and the lady didn't come in purple!  

Looking at the CD again, I found the image, but in white, so I used my promarkers and coloured the image in.  I was well impressed, I don't think you would have thought it had been hand coloured! As an extra touch I sprayed the image with Crafters Companion Spray and Shine, which enances all the colour.  I used the the Lattice spellbinders die to make the frame and an embossing folder for the background.  I was very pleased with the end result and hope that Kerri and her niece were too.  


I've also added a picture of the first card I made (also for another of Kerri's nieces). It's very difficult to make the same card twice, and I think you improve on it each time you do..  


Which one do you prefer?  

Sunday, 14 July 2013

A birthday Card with a difference


Wow, what a crafty weekend I have had and in all this heat!

Friday night, about 8pm started making a chipboard album for my brother in law, who was 75 the following day.  He is such a lovely person, and he's been in my life since I was three and we get on really well.  He's a very young 75 and I couldn't have asked for a better brother-in-law.

He always loves my handmade cards and I always try to make him something special!  Well this time I decided to make a chipboard album with photos taken throughout his life and marking the milestones.  I had to stop at 1.30 am in the morning, basically cos I couldn't see straight, but next morning at 7 am back again to finish it off.  Three hours later and it was finished.  We were going to his house at 2 o'clock for a barbecue - no pressure there and I had to take my Mum out beforehand!  Anyway, the results you can see below.  I was surprised how easy the chipboard books were to use (I used the Papermania one) covering the pages with some Scrapbooking paper.  I also used the X cut alphabet set, which I was pleasantly surprised how good it cut out the letters.  Well worth the investment!  I would definitely use the chipboard books again (perhaps I would give myself more time next time lol- but knowing me I won't lol). 

 He was thrilled with it and kept showing it off to everyone at the Barbie bless him.  


Oh, the blank page is for me to add pictures of Bern with his other two children when they were born, although his eldest who is in the photo, was quite happy with that I had left it blank!  (They do love their siblings really!!!) 

I also had an order to make an 18th birthday card by Sunday morning, so I also had that to do!  So when I got back from the barbecue it was a quick nap and then back to the craft room, finally finished it about half an hour ago.  Will post this one later on tonight when it's been collected - just in case!

Thanks for popping by on this gloriously hot SUMMER day (Yeah it's finally arrived - worth waiting for!)

Sunday, 16 June 2013

Cupcakes for a 3 year old

Here's a card I was asked to make for someone's Grandaughter who was 3 (pretty self explanatory that lol!). I had in my head that it was going to be pink but it turned out turquoise and lemon, with a hint of pink!  Why does that always happen?  You get an idea in your head as to what the card will be like and by the time it's finished it's completely different (but probably a lot better)

Once again using the Grand stately circles, cutting one in yellow and the other in white.  The white one I edged in pale yellow and green pan pastels (altho' the green hasn't shown up very well in the picture) The image is a Lili o' Valley stamp coloured with Promarkers.  I was pretty pleased with this, seeing as I only had a couple of nights to do it in, as 'Grandad' thought her birthday was in July lol!  

Well that's it for the time being. Off to enjoy the sunshine - whilst it lasts!  
Whatever you're doing enjoy x. 

Monday, 10 June 2013

Eadie Mae Circle card


I've never made a completely round card before, so I thought I would share the one I made for friends of ours who had a baby daughter last week.  She weighed in at 9lbs and is absolutely gorgeous and I had a lovely cuddle with her yesterday and even got to feed her, although we left before it was time to change her nappy lol.

Anyway getting back to the card!  I folded a sheet of A3 card and used the grand decorative circles to cut out the shape and then used the same dies, one the same size and two smaller ones to cut from pink paper (think this was the Lucy Cromwell pad - I love that paper!)   I stamped the image onto the smaller circle and then paper pieced it using the scraps from the sheets (us crafters don't waste anything!). 

I then stamped her name and date of birth using the Clarity stamps and then made the flowers from a x-cut petal punch which I had bought at a reduced price the day before!!!! 

I just realised there was a loose petal on the right flower when I took the photo - oops!

Eadie Mae also has an elder brother Archie (who's 4 and a half) and not wanting to leave him out I made him a big brother card, which bless him he recorded a thank you message for me on Facebook. It was one of those cards that didn't take too long to make but the reward was well worth it.  


Thursday, 9 May 2013

Perry's Tours

At last I've blogged again (sounds like a cue for a song!!I) its not that I haven't been busy making cards and other crafty things recently, but had lost my mojo for blogging!!! However, I have finally got round to it, not much on the tele and I can't get past a level on Candy Crush, so thought I would bug my crafty friends with a card I add earlier tonight for a chap at work.

I actually work at a bus depot (no I am not a driver, but I do admire the job that they do as it is no fun when dealing with members of the public). One of the inspectors took out a bus last year to cover someone's shift and ended up having a prang! And we haven't let him forget it yet, so hence the slider card with the bus crashing into the bollard. I made the background using some Hobby Art stamps and used promarkers and pan pastels to colour it in. Hope it survives everyone signing it and that he sees the funny side, he's a good chap so I think he will - fingers crossed.

As I have not been on for a while will rectify this by uploading my projects one by one throughout the next few days. Thank you for taking time to have a browse and for any comments you may wish to leave, they are much appreciated xxx

Monday, 18 March 2013

Two of a kind, but different!

I was recently asked by the mother of the brides for twin sisters getting married within two weeks of each other, one wedding has already taken place so I thought I would publish the first card, the second one will follow later, just in case they check out my blog beforehand!

The theme of the wedding was a beach theme, with sand, shells and exotic flowers as table decorations so I chose to use the shells that I had picked up from a beach years ago (see I knew they would come in handy sometime lol!). I used real lace and pearls to decorate the card, as the bride had a very lacy veil and added a couple of homemade hat pins. I also stamped the cream card with a lace stamp and embossed it with white embossing powder. I also made a box to put t in.

Watch this space for the second one, should be here shortly.


Sunday, 3 February 2013

A Gift Box

Thought I would share a gift box I made this evening. It's to put Callie's bunting in (no she still hasn't got it yet - what am I like?) Anyway, once again I used the Papermania spots & stripes capsule collection (think I've been calling it something else lol!), in fact I used what was left over from the bunting, so quite productive and thrifty me thinks. (Seeing as I went to the craft shop today and spent some more money - naughty naughty ;). The butterfly on the top is cut from one of Spellbinders Expandable pattern dies. Hadn't used this before, apart from when it arrived and I tried it with paper and tore it when trying to get it out of the die! But in a moment of inspiration thought I'd try it again and I think it looks quite elegant. Well I'm off to bed as I've got work tomorrow - another day at the fun factory - can't wait :(. Thanks for popping by, take care and see you all soon xxx

Saturday, 2 February 2013

A sprinkling of Red.....

Thought I'd share with you the card I made, as part of the design team (i like saying that!) for The Cupboard Trilogy latest Challenge.

It's an 8x8" card blank which is covered by (top half) Lucy Cromwell paper, which I embossed with a heart folder. The bottom half, I've used a stripey paper from the latest papers from Docrafts the candy dots and stripes collection, they compliment each other perfectly. The central topper is made using the new docrafts die. I cut it twice and the cut one down so that it would layer one on top of each other, after I had used my distress ink to tone the white card down! A spellbinder large scalloped circle cut out in red card and a red ribbon add the touch of red. The sentiment stamped adds the romance!

I stamped the flourishes after I had embossed, but with hindsight should have done it before. Oh and for the dots in the corners I used my creative expressions pva glue and sprinkled red glitter on it while it was still wet! it sort of worked, but they did dip slightly!

Why not follow the link and take part in the challenge, there's a brilliant prize to be one, so go on have a go - it's easier than you think......
http://thecupboardtrilogychallenges.blogspot.co.uk/2013/02/challenge-8-sprinkling-of-red-and.html?m=1

Thursday, 31 January 2013

Callie's Room

Remember just before Christmas I was asked to make a Christmas card with a silhouette of a pregnant lady (OH's niece who was due to have her baby around that time - see Last Minute Rush post if you missed it!). Well anyway, baby Callie arrived safe and sound on 22 December 2012.

When her sister Molly was born, I made a card with her name on, which her Mum put on her bedroom door, so when Callie arrived she asked me whether I would make something along those lines again. So here it is, something a little different, but something I enjoyed making and discovered my Cricut again!!! Making things for little girls is always enjoyable because you can use pretty colours and bows etc. and I might even make a few more for next craft fair I do! (I live in hope that something sells!!!).

Just got to get it to her before she turns 21 lol! Don't think she'll appreciate it then lol!!!
Thanks for looking and for taking the time to leave me a comment. Take care xxx

Monday, 14 January 2013

Boys & Their Toys

What a great start to the New Year so far, I've had a card published in the Docrafts Creativity magazine (January issue) and also been asked to join two design teams. One of which is the Cards Galore Scrapbook Group.

I had been a scrapper over the years, but never got round to doing many pages, cards always seemed to take precedence when crafting. However, when I got the invite to join a scrapping team I was delighted and jumped at the chance, my first entry can be seen at http://cardsgalore scrapbookingchallenge.blogspot.ie/. The theme this month is any theme goes, with a fantastic prize from our sponsor The Stamping Shack.

It's a rather simple paper layout, I've used a picture of my OH with one of his model planes, not a good picture of him, looks a bit scruffy, but he hates having his pic taken at the best of times. This is one for his scrapbook, should have plenty to put into it with all his hobbies past and present lol. The image is from The Stamping Shack, it was lovely to colour in (using promarkers) nice clean lines and I hope it will inspire you to join in the challenge. Thanks for looking xxx

Sunday, 13 January 2013

On a Roll.....

Now I've started I can't stop! If you've got the Holly Pond CD you'll know what I mean. Here are two more cards I've made this afternoon. It's been a real pleasure doing so as well. Think it's using bright colours again, makes you think of spring and summer - not long now, it'll soon be here (I hope!!!).

I think the cards are self explanatory - the one thing I will say is I used the Cosmic Shimmer PVA Pearl glue to do the pearls around the edge of the wedding card - in fact I did that last night, so that I didn't smudge them today when putting the card together - is although I used the white glue, it took on the colour of the paper behind it, which was lovely as they are now a really delicate pink so well pleased with that.

Once again, thank you for taking a peak, hope you like them as much as I do xxx


Saturday, 12 January 2013

Holly Pond Hill Time

I love this time of night when everyone is in bed and it's all quiet, no television and a lovely cup of tea.
After all the birthday celebrations in our house this week for my sons's 22nd, baking two cakes one chocolate and the other a checkerboard cake, which thanks to someone lending me the proper cake tins made it a lot easier - but still time consuming and family coming round to help him blow out the candles lol x I finally had time this evening to print off and play with my new Joanna Sheen Holly Pond Hill CD. Wow - the images are just so beautiful and some of them are so beautifully coloured. I have made two so far, and one I actually took a picture of the backing paper before I put on the topper - they are stunning. You can make them as complicated or as simple as you wish - gone for the simple options tonight! Hopefully if I get some more time to myself tomorrow so a few more may get made! Watch this space.

Thanks for popping by and stay warm and safe - looks like we've got some nasty weather coming in this week so take care xxx


Wednesday, 9 January 2013

Chronology - time flies!

At last I can upload this card I made on Saturday for my son whose 22 today! It only seems like yesterday when I held him in my arms for the very first time and my has he grown!!!!

The card was made using two sheets one orange dotty and the other turquoise stripes from the Papermania Dots & Stripes 12 x 12 pad, which is actually double sided so you get twice the choice. I distressed the edges with TH distress inks and cut out the oval using a grand nestability. The lattice cut is made using a Spellbinders extendable die and the cogs, topper and the orange paper (behind the lattice) are all from the Docrafts Goody bag, which I must admit is a brilliant deal this time.

My son liked it and I hope you do too enough to leave me a comment. Thanks for piping by and see you soon xxx

Sunday, 30 December 2012

Hugs & Kisses

Yesterday I was lucky to get to our local Craft Shops rummage sale (well the bank manager was even luckier lol!) - and bought some rubber stamps that were reduced in price. Been playing with them this morning and thought I'd show you this one, the others will follow!

It's one of the Crafters Companion Humphrey stamps, which I thought would be good for anniversary cards (perhaps). It stamped lovely and is so easy to colour. The pink background paper was stamped using an indigo Blu stamp with a versamark clear pad and embossed in clear embossing powder. The blue ribbon was a piece I found on my desk left over from another project, although it wasn't quite long enough so cut it in half and put the two ends at each side (just don't tell anyone there's a gap in the middle - hopefully they won't notice!!!). I used a pale blue pan pastel to edge the topper, just to give it a bit of depth.

Thanks for popping by to have a look, may I take this opportunity (in case I don't get another) to wish you and yours a very happy and healthy 2013 and look forward to sharing more of my creations with you. Take care xxx


Saturday, 29 December 2012

Lead By Example

In November of last year I was lucky enough to be asked to join the DT of The Cupboard Trilogy and here is my first entry into their latest challenge - #7 Lead By Example. It's very simple, you just have to look at the design team samples, choose one and make a card/scrapbook page using the same layout, of course you can add to it, turn it around etc, but we still need to be able to see the original in the layout (if you get my drift?). There's a lovely prize for one lucky winner, so well worth having a go.

The card I've made is an 8x8 covered in a light blue rose background, the bottom half of which I stamped with an Indigo Blu harlequin stamp using a pale blue distress ink, as well as a grey versafine. The topper is made using a Kanban stamp (stamped twice onto two different sized ovals) coloured with promarkers and then mounted on top of one another. A white ribbon coloured with the same colour promarker blue pen and ruffled slightly. The greeting is stamped using the Art Deco stamps from Docrafts and a spellbinders die. Nothing too difficult, but leaves you plenty of scope to elaborate on.

I hope you like my card and leave me a comment and why not have a go at the challenge too. http://thecupboardtrilogychallenges.blogspot.co.uk. Thanks for stopping by and good luck xxx

Saturday, 22 December 2012

Christmas Wreath

Thought I'd share this with you, as I've just finished it (surprisingly in time for Christmas!). I'd seen ready made ones in the shops, but thought too expensive, then I saw one on Pinterest and I was off. With a little help from a wire hanger and a glue gun and several burnt fingers later here it is - proudly hanging on my front door. The photo doesn't really do it justice, as it looks a bit misshapen, but it isn't and I'm not sure about the bow!!!!

Well, this may be my last blog this side of Christmas, so I'd just like to take this opportunity to wish all of my followers a very Happy Christmas and an even happier new year. Hope you stay safe and healthy. Thanks for all your lovely comments over the past few months and look forward to sharing more of my creations in 2013. Xxx


Tuesday, 18 December 2012

Last Minute Rush

Talk about leave things to the last minute! Men! Had OH brother ask me on Saturday if I could do three cards for his kids (two grown ups and one for his granddaughter) no rush he says but can I have them by Wednesday? Yes I said, no problem. Then he asks could you do one with a pregnant lady in silhouette on it (or better still a couple), Yes I said course I can. Then I locked myself in a cupboard and cried (only joking)

Anyway, to cut a long story short and with a little help from my crafting friends (especially Danielle Spencer and Joan M Doherty) I made the first card for his daughter who's expecting her baby on Christmas Day. I took the image from the Internet and coloured it with promarkers, I printed the message he wanted "this Christmas you will give the greatest gift of all...." And on the insert it reads: 'the gift of life" onto some green backing paper (looks a mucky grey in the photo!).  Used some gilding flakes on the flourishes and added a red ribbon. Not sure if it's Christmassy enough, but hopefully he'll like it - not sure if I do or not????

The second card I've uploaded is the one for his granddaughter Molly. It's her Mum who's having the baby so I thought I'd make her something a little different, so decided on a shaker card. I just love this stamp he's such a cute snowman :). I was really pleased how this one turned out and it didn't take me too long - unlike this blog! Well if you haven't fallen asleep by this stage or lost the will to live! then leave me a comment and I look forward to reading them later. Thanks for popping by.

Oh PS by the way lucky enough he found one from my stash for his son so that was a relief lol!


Wednesday, 12 December 2012

Friendship is a Grand Calibur

Thought I would share with you a card I've made this evening using my new spellbinder extendable trellis die and a few other dies i had in my stash already. I must admit the trellis die proved a bit difficult to cut (especially in the middle) but perseverance won through.

The ovals were cut using an x-cut die, which are ok, but currently waiting for my grand oval nest abilities to arrive. I like the colour scheme I've used on this one, even if I say so myself lol although I think the centre of the flowers look a bit too green but I'll check in the morning in natural daylight (if we have any at the moment).

Well it's getting late and I can hear my bed calling. Thank you for popping by and pleeeease leave a comment (I can take criticism as well). See you soon xxx

Monday, 10 December 2012

Just Messing Around

Have bought several crafty bits and bobs recently, (should really have been Christmas shopping but what the heck!!!!) but not had the time to use any of them (could that be karma?) But tonight I made the effort to get to my craft desk and have a play and here's what I came up with.

Using a mask, which I had already and then a combination of background stamps from Indigo Blu (Harlequin, Honeycomb and Script) and Wow stamps and the new colours in my pan pastel collection, oh and the dragonfly from an Imagination set I had fun. Even the pink border was made with the Wow foliage stamp and pink pans!

Hope you like it enough to leave me a comment. Thanks for popping by :).

Monday, 3 December 2012

Flutter by Sophie

Here's a card I've made for my great niece who's six tomorrow. It started out as a simple card and then turned into something more epic (isn't that always the way???).

For the front I've used the Boo stamps that came free on a mag - which have been quite useful - then for the lettering I used Clarity's letterbox stamp and for the number the papermania set! All coloured in with promarkers.

For the inside I spelt out her name using Fourth Dimensions alphabet stamps and mounted the butterflies on to acetate. And there it is, started yesterday, and completed it tonight after spending most of the day Christmas shopping with my Mum, now I'm off out to see David Essex - rock on!!!!! Thanks for popping by and for leaving me a comment xxxx


Wednesday, 21 November 2012

Lady in Red.....

Couldn't post this earlier, but here's a card I made for my lovely niece Claire, who's birthday is today. Just been round for a piece of cake and a cuppa, it's tradition in our family that no matter how old (or young) you do not escape blowing out the candles, so my 43 year old niece did us proud by blowing out her candles with one puff lol!

Anyway getting back to the card. Just for a change it's an 8x8 card, layered with black textured paper and then a sheet from the Papermania Black & white Capsule collection, topped with a red embossed sheet and cut out from a grand nestability. The Art Deco lady is from the new Docrafts range (you may have seen her in another of my blogs (art Deco número three), but how different she looks in another colour. I used black and red glitters to enhance her dress and made the embellishment from feathers, the roses are made from modelling clay and the wire is twisted round my pokey tool with stars glued to the end.

My niece loved it and hope you do too. Leave me a comment

Sunday, 18 November 2012

A bit of luck!

Had a brill weekend so far made at least five cards - that must be a record for me - but still got to make a birthday card for my niece, so hopefully will get that done later!

Anyway, what do I mean by a bit of luck? Well, I was hunting around for something for a card I made last night when I opened a drawer and found loads of toppers including this one, all coloured in and ready to go - must have made them last year, but never got round to doing anything with them.

Well a bit of distress ink around the edges and a touch of glitter and voila, a pretty easel card. I'm afraid the photo doesn't do it justice - but think you get the gist?

Well I suppose I'd better go and get dressed now as it's gone midday! Time flies when you're having fun and left alone to enjoy it lol x


Saturday, 17 November 2012

All I want for Christmas is......

More Pan Pastels please Father Christmas, love you x. If only it was that easy :).

I loved making this 8x8 card using my pan pastels to make the centre section, although can't take all the credit, got the idea originally from two crafting friends Zoe Russell and Barbara Daines (hopefully they'll still be my friends when they see this - my cards are nowhere near their standard, but thanks for the inspiration ladies x).

It was quick and fairly simple and hopefully someone will buy it next week at the Craft Fair! (We live in hope)

A Touch of Gold

Here's a card that I made last night, using a glue pad, a rubber stamp and some gold leaf. Pretty pleased with the outcome and think that it works well with the black and gold paper. Hope you like it enough to leave a comment. Thank you xxx

Tuesday, 13 November 2012

Nativity

Didn't start out to make this card, but suddenly I remembered I'd bought the stamp last year and guess what never used it! Well there isn't many ocassions where you can use a Christmas card throughout the year - well that's my excuse and I'm sticking to it lol.

I just stamped in on to white card, coloured it in with promarkers. Stamped a few random stars and one larger one and embossed them in white and then used my pan pastels (I've only got pastel colours - at the mo) but it sort of gives a subtle shade to it. Added a bit of sticklers for a bit of bling and there you go another Christmas card for your perusal. Hope you like it - it's got almost a childish quality to it!

Monday, 12 November 2012

A Variation on a Theme

Was a bit fed up tonight, so made another version of the Christmas Baubles card. This time I used the paper piecing technique (think that's what it's called?).

I found some 6x6 pearlescent paper which I stamped the baubles on using a Stazon on ink pad (that was after I stamped them first with a versafine ink pad and found black smudge marks over the white card - oops!). Anyway, I then stamped them where I wanted them on the card and then placed the cut out ones on top, using a bit of pin flair to raise them slightly.

Instead of red gems, I used diamond glaze to accentuate (I like that word!) the berries.

I think this card is OK, but the freehand line around the edge looks a bit amateurish - must try harder next time.

Well till the next time - thanks for visiting, see you again soon x

Sunday, 11 November 2012

Love and laughter

Well another weekend bites the dust, but hope it's been a good one for you all. Here's another card I've made that I'd like to share with you.

I started out playing with my pan pastels using them to make a background, which I then stamped the flowers on and cut them out (this was the same piece of background as the teddy bear card - Baby Pans)

As I was looking for a piece of card to mat the Teddy on, this piece of lilac glitter card fell out and inspired me to use it with the flowers.

I used a small square spellbinders die to cut out three apertures from the glitter card and mounted it on yellow card. Then I used a panel of the yellow card to stamp the verse and tied a lilac ribbon and bow around it. I wasn't sure if it needed something else, but decided to leave it alone - still not sure now - but sometimes less is more as they say.

Anyway, I hope you like it and appreciate you popping by to take a look. Thanks for leaving me a comment - I love reading them all xxx

Saturday, 10 November 2012

Christmas Baubles

Here's an 8x8 card (that's unusual for me!), using the docrafts Urban Christmas stamps.

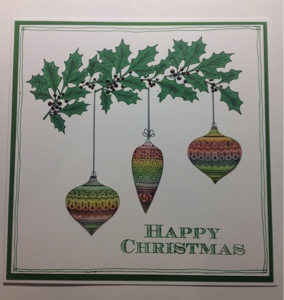
I masked the holly leaves so I could stamp them three times and then coloured them using the pine promarkers. I stamped the baubles and then coloured them too with promarkers and then covered them with diamond glaze. The text stamp I think came from another stamp set (can't remember which one sorry!). Added some gems to the berries and drew a freehand line around the edge, mounted it on to red card and that's it.

A fairly easy card, but very effective - hope you agree.

Thanks again for popping by and if you're a new follower, welcome x

Friday, 9 November 2012

Baby pans

After a busy week at work I needed to get into my craft room tonight and chill a little ( well the room was a bit cold as well, but think you know what I mean - a little me time!!!).

Late last night I watched a demo on C & C, I think it was a lady from Indigo Blu, but I didn't catch her name, but she was using pan pastels and she made a background by putting dabs of colour on a piece of smooth card until it was completely covered and made a background and then stamped over it with an image to give a beautiful effect. Thought it was a lovely idea, just a shame I didn't get to see the end of the demo cos I fell asleep and woke up to the next programme!! Typical!!!

Anyway, I remembered the technique tonight and gave it a go and here is the card I made. It didn't start out as a baby card I stamped a flower at first, but then I remembered the teddy bear stamp and as they say the rest is history :D. The square behind the teddy, the teddy itself and the letters are all done in the same way, I hope you agree that it does look quite good, even if I say so myself. Ooh forgot to say, the letters are sprayed with the CC iridescent glitter spray and that seems to enhance the colours even more.
Thanks for visiting, really do appreciate all your comments x

Monday, 5 November 2012

Simples!

Here's a small easel card I made last night, after I was able to get into my craft room aka my sons bedroom, after he had gone back to his flat after staying for a few days.

I used the free stamps from a magazine that I got recently (sorry can't remember which one) and stamped them onto a scalloped square (nestability) coloured the images with promarkers, added a bit of glitter glue and ta da - here it is!

Hope you like it x

Sunday, 28 October 2012

Art Deco Número three!

Ok, you're probably getting bored with these now, but thank you for coming to visit my blog to view this third card in the series (you'll be even more pleased to know there is only one more left to show and that will probably happen sometime during the week!)

Well now that I've got you here, may as well tell you what I used to make it. Once again it's an 8x8 card covered with black mirror card and then some terracotta coloured card, which I have had in my stash for years, probably because it's not one of my fav colours. (But that might change now!). I embossed it with the 8x8 embossalicious folder from Die'sire.
The stamp was coloured in with promarkers and glittered with the 'pee wee' glitters.
The embellishment was made using the Glitter Girls emboss to impress board - something else I've had and never used lol (do we see a pattern forming here????). I was going to use feathers but didn't have the right colour.
I've really enjoyed crafting this weekend - good to have some 'me' time at last - think we all need that don't we. Anyway girls (and guys) thanks once again for visiting and for all your comments xxxx

Incidentally, if you haven't seen the other cards (as I had trouble with sharing on Facebook/blogger for the first one, check them out through the older posts x)

I'm entering this card in to the Visible Image inspired by Autumn challenge http://www.visibleimage.co.uk/default.htm

Saturday, 27 October 2012

Art Deco número two

Finally got round to making a second card this evening, again using one of the new Art Deco stamps.
Kept this one relatively simple. Embossed some 12x12 paper (well it was cut down to 8x8 to fit the card!) using the Art Deco embossing folder from Die'sire.
I coloured the image with blue promarkers and using my fancy cut corner scissors (twice in one day, that's more than I've ever used them before lol) mounted it on navy card and whilst I was looking for the card, the 'angel hair' fell out of the box - sometimes it just all comes together!!!
I cut a couple of flourishes from a Marianne creatables die and coloured them with 'tumbled glass' distress ink and added a few gems. Oh and I used some blue 'pee wee' glitter, it gives such a lovely sparkle.
It's certainly a pleasure using these stamps, certainly don't think these will get lost at the back of the cupboard ;)

Art Deco Número Uno

I was lucky enough to get hold of the new Do Crafts range of Art Deco Stamps today and wow they are amazing.

Here's the first card I've made so far. As usual an 8x8 black card blank topped with a piece of Lucy Cromwell paper, I used my Art Deco scissors to cut the corner (had these for years but never really used them, think they may now come into their own!). The 'happy birthday' is a stamp that comes with one of the other sets and the feathers and embellishment I had in my stock already. Incidentally the ribbon is coloured with promarkers to match the dress.
This is one of those cards that I feel really pleased with and hope you like it too.
Thanks for popping by and thank you even more if you've left a comment, they really do make it worthwhile. Stay warm and keep crafting :D

Saturday, 20 October 2012

Not Sure???

Here's a card I've made for my sister for her 60th but I'm not sure - not exactly one of my best or am I being too critical because it didn't take long to do???

I used one of my new 8x8 embossing folders and then coloured it with pan pastels the numbers and flowers I had in my stash. Used a background stamp and a Kanban stamp to give it some interest and then die cut the butterfly.
Would really be interested to know if you would give this to someone, or would you be pleased to receive it????

Tuesday, 16 October 2012

Liquorice Allsorts!!!

That got you all going, thought you were going to see a really pretty card in sweetie colours well ha fooled you!!!

As I mentioned earlier in the week when I blogged my cousins card 'One Man and his Dog', it's also his sisters' birthday this week so here's a card I've made for her too. That's where the alsorts come in. I've used micro beads (Cor don't they get every where even if you're really careful) and I've used the creative expressions pearl pva glue! Both for the very first time, but I think I'm pleased with the results.
It was going so well until I put it altogether and stuck the backing papers down and realised the card blank was the wrong way and didn't open right to left (like a book?), but rather bottom to top (like a calendar) but I don't think anyone will notice do you - not if we don't tell anyone!!!!

Anyway, hope you like what you see and thanks in advance for leaving a comment xxxx